Gearnix Documentation
  • GREETING
    • Welcome to Gearnix
    • How To Get Support
    • Full Theme Features
    • Change Log
    • FAQs
  • ⚙️INSTALLATION
    • How to Install & Activate
    • Where Is My Purchase Code?
    • Transfer License To a New Domain
    • Importing Sample Images
    • Importing Products With a CSV File
  • ⚙️GENERAL SETTINGS
    • Homepage Settings
    • Theme Settings
    • Header Settings
    • Edit Default Theme Content
    • Theme Colors
    • Button System
    • Typography
    • Product Element Settings
    • Enable Customer Account
    • Social Media
    • Wishlist
    • Product Review App
    • Quick View
    • Search Settings
    • Newsletter Popup
    • Fake Sale Popup
    • GDPR Popup
    • Currency Settings
    • Language Settings
      • Enable RTL Layout
    • Free Shipping Threshold
    • Create Cross-Sell Collection
    • Product Countdown Time
    • Notify Me When Out Of Stock
    • Breadcrumbs Settings
    • Metafields Settings
    • Favicon
    • Checkout
  • MENU SETTING
    • Main Menu
    • Mobile Menu
  • CART SETTINGS
    • Cart Popup
    • Mini Cart Canvas
  • PRODUCT PAGE SETTINGS
    • Setup Product Page Layout
    • Product Page Settings
    • Variants Settings
    • Variants Pattern
    • Product Pre-Order
    • Sticky Add To Cart
  • COLLECTIONS PAGE
    • Setup Collection Page Layout
    • Collection Page Settings
    • Filter Sidebar
    • Content Organisation
  • BLOG SETTINGS
    • Setup Blog Page Layout
    • Setup Blog Detail Layout
    • Blog Comment Settings
Powered by GitBook
On this page
  1. GENERAL SETTINGS

Wishlist

PreviousSocial MediaNextProduct Review App

The wishlist app is built into our theme. After installing the Theme, you need to create a page wishlist and configure the page for this app to work correctly. If you do not follow the steps as instructed, your wishlist function will not work, and you may mistakenly think that this function is faulty.

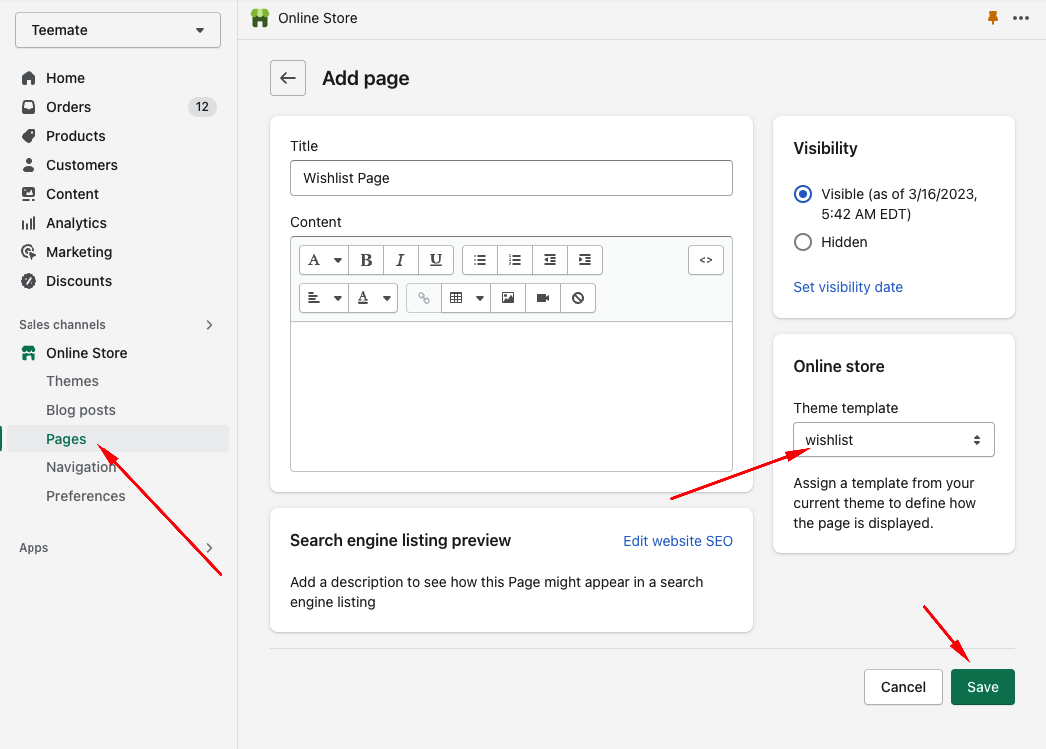
Step 1: From your Shopify admin, go to "Online Store" > "Page" > Click "Add Page" Button.

  1. Create a page named "wishlist" or whatever you feel is relevant (It is not necessary to name the page correctly as "Wishlist")

  2. Theme template: Select the template "Wishlist" (This option is required)

  3. Click the "Save" button to finish.

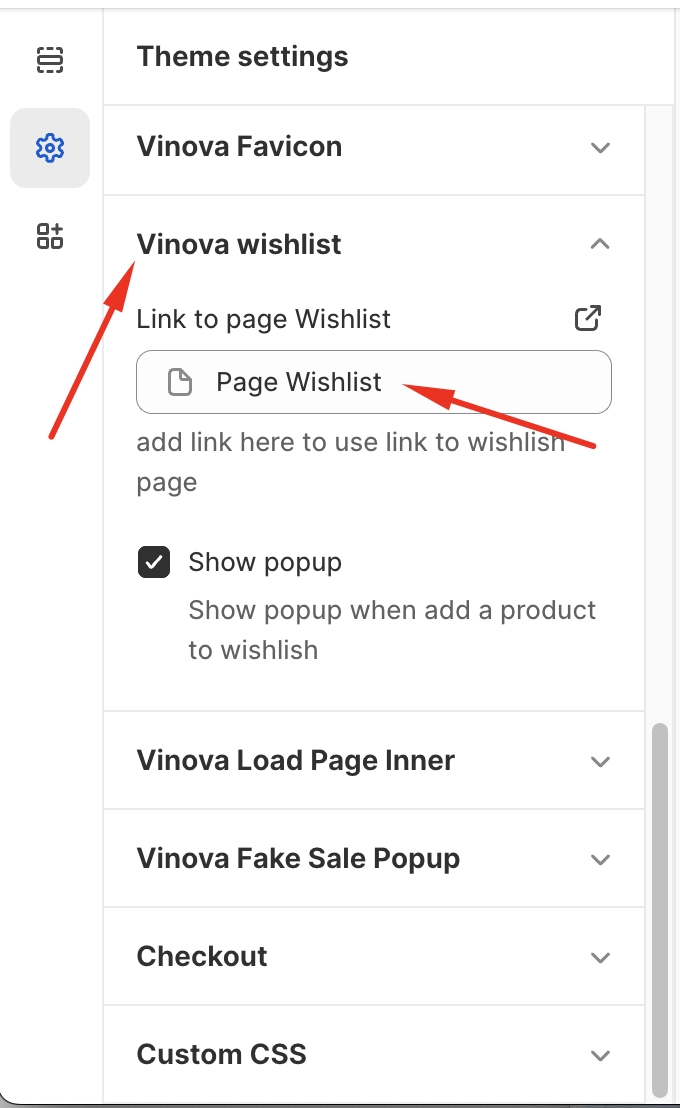
Step 2: From "Theme settings", Click the Tab "Vinova Wishlist" and link to the wishlist page you just created. Click the "Save" button to finish.

⚙️